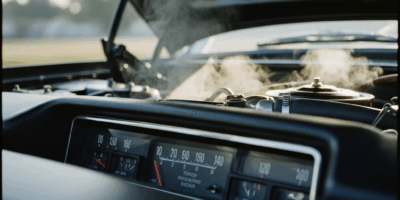
What Brake Fade Actually Feels Like in a Classic Car
Classic car brake fade has gotten complicated with all the misinformation flying around — most of it borrowed from track-day guides written for Brembos and four-piston calipers. None of that applies to your drum-brake Chevelle. As someone who drove a ’68 Chevelle down a canyon road in July and felt the pedal turn to mush around mile three, I learned everything there is to know about vintage brake fade. Today, I will share it all with you.
So, without further ado, let’s dive in.
The sensation itself is hard to describe until it happens to you. Your foot pushes down. The pedal softens. It sinks lower than it should, feeling vaguely spongy — like pressing a thumb into wet clay instead of a firm surface. After repeated stops on a long descent or a crowded show-day crawl, stopping distances stretch out in a way that makes you genuinely do the mental math on whether you’ll make the intersection.
But what is brake fade, exactly? In essence, it’s a loss of braking force caused by heat overwhelming some component in your system. But it’s much more than that. The specific failure point changes everything about how it feels and what actually fixes it.
Fluid fade feels like the floor is slowly dropping out — each application sinks the pedal a little lower. Pad or shoe fade keeps the pedal firm but stretches your stopping distance noticeably. You’ll sometimes catch a hot, acrid smell drifting up from the wheel wells. That’s glazed shoes, overheated drums, or both. Don’t ignore it. That smell is your brakes telling you something’s already gone wrong.
My canyon road situation turned out to be original DOT 3 fluid — fifty years old, fully saturated with moisture, boiling point somewhere around 280°F. The drums were generating more heat than that on the way down. Probably should have opened with that detail, honestly. It cost me twenty-two dollars in DOT 4 fluid and an afternoon of sweating in my driveway to fix what could have ended much worse.
The Most Common Causes in Vintage Brake Systems
Old brake fluid sits at the top of the list. DOT 3 — the factory-fill standard for virtually every American classic — starts life with a dry boiling point around 400°F. That sounds fine. The problem is wet boiling point, which is what matters after the fluid has absorbed atmospheric moisture over decades of sitting. Wet DOT 3 boils closer to 284°F. Your drums can exceed that on a warm day with repeated stops. Boiling fluid compresses. Compressed fluid doesn’t move pistons. The pedal dies.
Worn wheel cylinder cups come second. These rubber seals — roughly the size and shape of a thick bottle cap — swell, crack, and weep fluid over time. A failing wheel cylinder loses pressure before it ever reaches the shoes. One compromised cylinder and you’ve effectively got three-wheel brakes, which explains why the pedal feels soft even with decent fluid.
Glazed brake shoes are third. Heat that’s hot enough to boil fluid is also hot enough to harden friction material. Glazed shoes develop a shiny, glass-like surface. They contact the drum. Nothing grips. More pressure generates more heat, which glazes them further. That’s what makes brake fade so punishing to classic car owners — it accelerates in a way that catches you off guard mid-drive.
The rubber flex hoses deserve their own moment here. Unlike braided stainless lines, original rubber hoses between your hard lines and wheel cylinders degrade from the inside out. The inner tube separates from the outer casing over decades. Under pressure, the hose bulges instead of transmitting force cleanly. The result is pedal lag — a noticeable delay between input and actual braking — that mimics master cylinder failure almost perfectly. I’m apparently the last person to check these, and replacing them solved a spongy pedal that three other repairs never touched. Don’t make my mistake.
Drum clearances matter more than most guides mention. Adjusted too tight, heat builds faster than it dissipates. Too loose, and you’re burning pedal travel before the shoes make meaningful contact. An improperly adjusted drum system fades sooner, works harder, and wears faster.
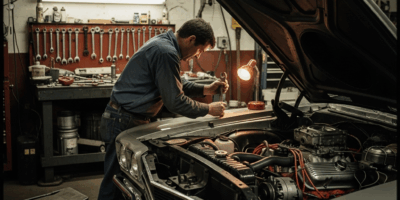
How to Flush and Replace Brake Fluid the Right Way
Start here. Honestly, start here before you pull a single drum. A complete fluid flush is the cheapest, highest-impact repair you can make on a classic with brake fade — and most people skip straight to hardware.
While you won’t need a full shop setup, you will need a handful of basic supplies. A turkey baster or brake fluid syringe for pulling old fluid from the master cylinder reservoir. Fresh DOT 4 fluid — at least two quarts. A bleeder hose, a catch bottle, and a wrench that fits your bleeder screws. That’s it.
Gravity bleeding might be the best option, as classic drum systems require patience more than pressure. That is because the system has low resistance and bleeds cleanly without equipment if you give it enough time. Open the bleeder valve at the wheel furthest from your master cylinder — typically the rear passenger — let fluid drip into a jar for twenty minutes, close it up, move to the next wheel. Two to four hours total. Costs nothing beyond supplies.
Pressure bleeding cuts that to about an hour. A basic pressure bleeder from Harbor Freight runs around twenty-eight dollars. Sears-branded equivalents hover around thirty-five. One person, no helper pumping the pedal, done before lunch.
Use DOT 4, not DOT 3. Dry boiling point around 446°F versus the original 400°F. Wet boiling point around 311°F. That improvement — roughly forty degrees on the wet side — genuinely matters on a July mountain drive. The price difference is about two dollars per quart. Skip DOT 5 silicone fluid unless you’re converting every seal and hose in the system simultaneously. DOT 5 isn’t compatible with original rubber, and mixing them causes more problems than fade ever did.
DIY fluid cost runs fifteen to twenty-five dollars. A shop will charge one hundred fifty to two hundred fifty dollars in labor. First, you should do this yourself — at least if you’ve ever changed oil and feel comfortable underneath a car.
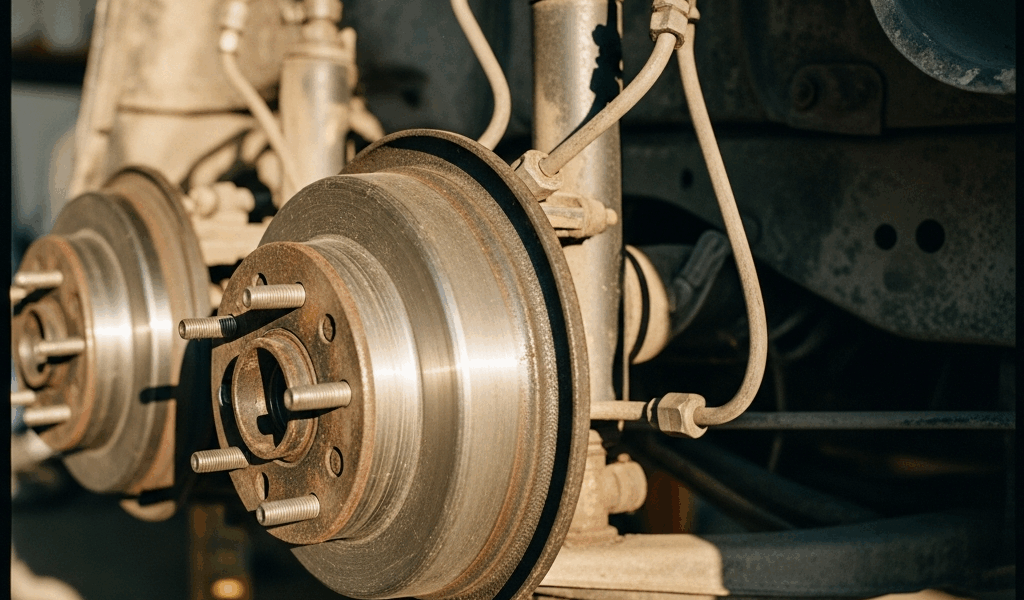
Inspecting Wheel Cylinders and Drum Hardware
Pull your drums. You’re looking for four things specifically.
One — the wheel cylinder boots. That small rubber accordion seal at the back of each cylinder. Split, cracked, or weeping brake fluid means the cylinder is failing. Replace it, not just the boot. Two — the drum surface. Run your fingernail across the inside. Deep score grooves mean the drum needs turning on a lathe or full replacement. Three — the shoes themselves. Healthy friction material looks dark brown with a slightly rough texture. Shiny and smooth means glazed. Glazed shoes don’t stop cars. Four — the return springs. They should snap back hard when deflected. Weak or stretched springs cause the shoes to drag, generating exactly the kind of continuous heat that speeds up fade.
A complete drum brake rebuild kit — cylinders, shoes, springs, all the small hardware — runs twenty to sixty dollars per axle depending on platform and whether you buy OEM-spec or quality aftermarket. Most common classics like first-gen Camaros, early Mustangs, and mid-size GM A-bodies have readily available parts. A weekend job. Basic tools. No specialty equipment required.
Do both axles. Front and rear. The tendency is to chase the worst axle and leave the other for later. “Later” usually means next summer, after another incident. Everything on your classic is the same age. Everything’s due at roughly the same time.
When Brake Fade Keeps Coming Back After Repairs
You flushed the fluid, replaced the cylinders, installed fresh shoes, and the fade came back anyway. Three things are still left to check.
Undersized brakes. Original 9-inch drums were engineered for the car as it left the factory — not with a 427 stuffed under the hood and radial tires generating more grip than the brake system was ever designed to handle. If your classic has been restomodded or you’re simply driving it harder than a Sunday show-car owner would, the original system can’t keep up. That’s not a maintenance failure. It’s a capacity problem.
Collapsed rubber flex hoses. The hard lines look fine. The hoses between the frame and the wheel assemblies have internal separation you can’t see from outside. Pressure builds, the hose expands instead of transmitting force, the pedal lags. Replace every rubber hose with steel braided equivalents — thirty to fifty dollars per hose kit for most platforms. It’s the fix that gets skipped most often and accounts for more “unexplained” spongy pedals than almost anything else.
Out-of-round drums. A drum turned flat at a machine shop will warp again if repeatedly overheated. Drum turning at a shop runs thirty to forty-five dollars per axle. Worth doing during any rebuild rather than re-installing drums you’re not certain about.
If all of that’s done and fade persists, a disc brake conversion is the permanent answer. Front-disc-only kits for common platforms — first-generation Mustangs, early Camaros — run four hundred to nine hundred dollars for a quality setup before labor. Full four-wheel disc conversion lands between fifteen hundred and twenty-five hundred dollars installed. It’s significant money. It’s also the last time you’ll think about brake fade, which has a value all its own for drivers who actually put miles on their classics instead of trailering them to shows.
Stay in the loop
Get the latest classic car craze updates delivered to your inbox.