“`html
Signs Your Classic Car Carburetor Might Be The Problem
I’ve spent enough time elbow-deep in engine bays to know that blaming the carburetor is often the first instinct—and honestly, often wrong. But sometimes it actually is the carb. Classic car carburetor problems come down to pattern recognition, really — matching what you’re experiencing to what’s happening inside that four-barrel (or two-barrel) mess of brass and rubber.
Here are the symptoms that actually point carb-ward:
- Rough idle at stops — The engine stumbles or shakes when you’re stopped at a light. The carburetor isn’t delivering a consistent fuel-air mixture at low throttle positions, usually because the idle circuit is clogged or the mixture screw is way off.
- Hesitation on acceleration — You punch the gas and the engine coughs before responding. The accelerator pump isn’t squirting fuel fast enough into the venturi, or it’s not squirting at all.
- Black smoke from the exhaust — Rich, sooty, unmistakable. The carburetor is dumping too much fuel relative to air — float stuck high, needle and seat leaking, or the air bleed passages blocked.
- Flooding — Fuel overflows from the carb onto your engine or drips from the overflow tubes. The float bowl can’t hold back the fuel pressure because the needle and seat are worn or stuck open.
- Hard starting when cold — You crank and crank. The choke isn’t delivering enough rich mixture, or it’s not engaging at all. Winter nightmare fuel.
- Surging at highway speed — RPMs climb and fall rhythmically without you touching the throttle. Usually a vacuum leak around the carburetor base, or an internal float issue creating a hunting effect.
Probably should have opened with this section, honestly. Knowing what symptom you’re actually chasing saves hours of wasted diagnosis.
How To Tell If It’s Really The Carburetor
Before you assume the carb needs work, eliminate everything else. I once spent a weekend rebuilding a Rochester 4-barrel on a ’72 Chevelle only to discover the real problem was a cracked distributor cap. Painful lesson.
Run these checks in order.
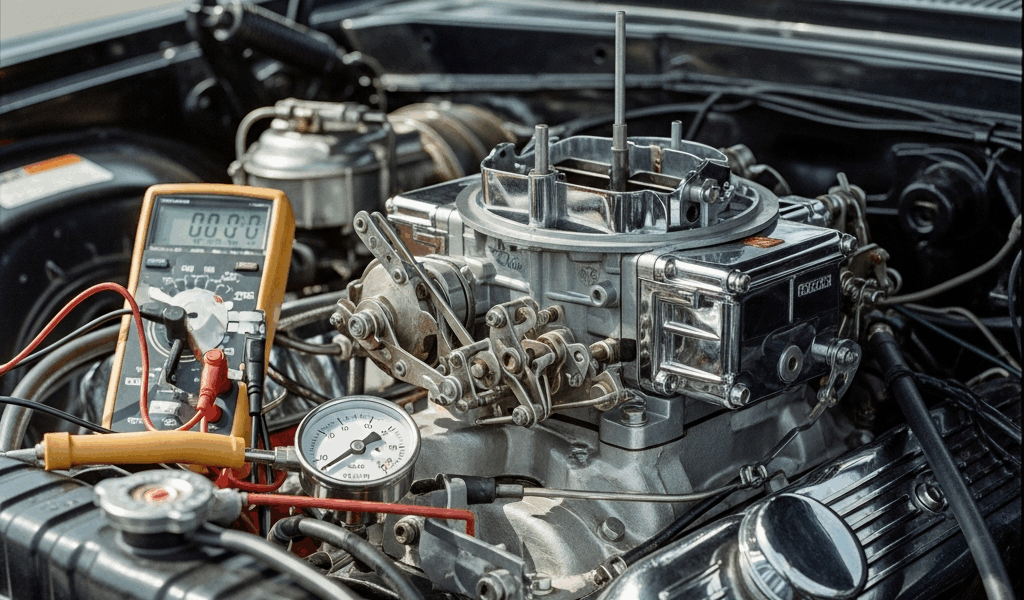
Fuel Pressure Test — 5 minutes
Locate the fuel inlet line on top of the carburetor. You need a fuel pressure gauge — auto parts store, $12–25 for a mechanical one. Loosen the inlet nut, thread the gauge in, and fire up the engine. Most carburetors on classics run 4–7 PSI. Higher pressure will blow the needle and seat open, causing flooding. Lower pressure starves the carb. Read the gauge steady-state. If it’s dancing around wildly, the fuel pump is failing — not the carb.
Spark Plug Color — 10 minutes
Kill the engine and pull a plug. Coffee-brown or tan means normal. Sooty black? Running rich — could be carb. Chalk-white and gapped out? Running lean, possibly carb starvation, but also could be ignition timing. This tells you whether excess fuel is actually the issue or if something else is masking a carb problem.
Fuel Smell — 2 minutes
Pop the air filter lid. Smell like a gas station? The carburetor is probably dumping raw fuel. Smell like normal? Then crude mixture issues might originate upstream (pump, filter, lines) or downstream (ignition).
Air Filter Condition — 3 minutes
A filthy, oil-soaked air filter restricts airflow and leans out the mixture artificially. Swap in a clean filter temporarily. Does the stumble improve? You just saved yourself a carb rebuild. The filter was the culprit.
Fuel Line Integrity — 5 minutes
Inspect the rubber fuel line from the pump to the carb. Look for cracks, swelling, or deterioration. Pinch it gently — it should feel firm, not squishy. A soft, swollen line is absorbing fuel vapors and swelling internally, restricting flow and causing lean-running hesitation that mimics carb starvation.
Common Carburetor Issues And What Causes Them
Now, assuming the carb actually needs attention. Here’s what’s broken and why.
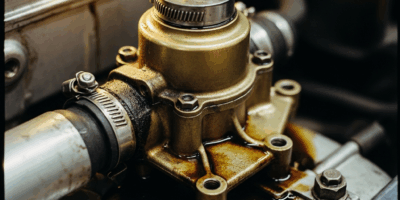
Float Bowl Crud And Varnish
Stale fuel oxidizes into gummy brown varnish that coats the inside of the float bowl and fuel passages. It starts as sticky residue and hardens into rock. Here’s what happens: varnish restricts the main jet opening, fuel can’t reach the engine fully, the engine runs lean and hesitates or stalls on acceleration. Gets worse as temperatures climb and fuel vaporizes around the varnish. This is usually the easiest fix — a proper soak in carburetor cleaner can dissolve it without disassembly.
Needle And Seat Wear
The float moves up and down, and a tiny needle valve — about the size of a ballpoint — sits in a tapered brass seat. Years of vibration, fuel debris, and corrosion wear both surfaces. The needle no longer seals tight. Here’s the domino effect: fuel dribbles past the needle constantly, float bowl overfills, fuel overflows or surges into the engine, causing rich running and black smoke. Wear accelerates if you run ethanol-laced fuel on a carb not designed for it. This one needs replacement or professional lapping — you can’t DIY your way around it.
Vacuum Leaks Around The Base
Carburetors bolt to the intake manifold with cork or rubber gaskets that rot after 40 years. Cracks allow unmeasured air to bypass the carburetor and lean out the mixture. The sequence: idle roughens because the engine’s mechanical design can’t adjust for the extra air, hesitation follows on low throttle, surging develops at cruise as the leak’s effect increases and decreases with throttle position. This is insidious because it feels like carb starvation but actually originates outside the carb.
Stuck Choke Mechanism
The choke is a butterfly valve that restricts airflow when cold, enriching the mixture for starting. Spring corrosion or carbon buildup freezes it open or closed. Choke stuck open means hard cold starts and poor cold-running quality. Choke stuck closed means black smoke and flooding even when warm, because you’re running the engine in permanent “cold start” mode. Visual inspection usually diagnoses this immediately — the butterfly should move freely by hand.
Internal Gasket Failure And Corrosion
The carburetor is a sandwich of castings held together by gaskets and screws. Corrosion eats away at brass passages or rubber gasket seals fail, allowing fuel and air to escape where they shouldn’t. Multiple circuits fail simultaneously — rough idle, hesitation, and flooding all happening at once. Behavior becomes unpredictable because you’ve lost fuel control in multiple places. This usually means rebuild time, because resealing one gasket won’t fix the corrosion that created the failure.
Quick Checks You Can Do Before Calling A Shop
Four tests that take less than 30 minutes and require only basic tools.
Carb Cleaner Spray Test For Vacuum Leaks
Engine running, spray carb cleaner around the carburetor base gasket. If RPM jumps or changes, you’ve found an air leak. The cleaner temporarily seals the crack. Don’t spray fuel lines or electrical components — aim for the gasket seam only. This test is free (assuming you have cleaner on hand) and instant.
Float Bowl Drain Check
Locate the drain plug at the bottom of the float bowl — usually a small bolt. Crack it open into a clean container and let fuel flow for three seconds. Look for water (it’ll separate and sink), rust particles (tan or red grit), or fuel that smells like old paint thinner (varnish breaking apart). Water means a fuel tank issue. Rust means internal carburetor corrosion. Varnish confirms crud buildup.
Choke Operation Visual Inspection
Remove the air filter top and look down into the carburetor. You’ll see a butterfly valve (the choke) above the main throttle butterfly. It should move freely when you work the throttle or pull the choke knob manually. If it’s stuck, won’t return, or moves sluggishly, that’s your diagnosis. No tools required.
Fuel Line Pressure Gauge Reading
I mentioned this above, but it deserves its own line because it’s the single most valuable diagnostic. A $20 gauge eliminates the fuel pump as a suspect. Needle bouncing wildly means pump. Steady at 4–7 PSI means look at the carburetor. Steady below 4 PSI means your fuel delivery is weak, but the carb might be fine — check the pump and filter first.
When It’s Time To Rebuild Or Replace
You now know what’s wrong. Time to decide what to do about it.
Clean-out-only cases — stuck choke, varnish in the bowl, simple gasket leak — are DIY territory if you’re patient. A good soak in carburetor cleaner (lacquer thinner or dedicated carb cleaner, not gasoline) overnight usually dissolves varnish. Replacing gaskets requires gasket sets ($20–40) and gentle disassembly. YouTube is full of walk-throughs for popular models.
But there are warning signs that DIY cleaning won’t cut it: corroded passages you can see into the casting, a needle and seat that rattles or has visible pitting, internal float corrosion, or brass that crumbles when you touch it. Internal corrosion means metal-to-metal surfaces are compromised. Cleaning won’t restore seal. Rebuild shops can lap the needle and seat back into spec, or replace them entirely.
Your three real options:
- Rebuild with original carburetor — Send it to a specialist or rebuild it yourself using a kit. Cheapest option ($50–150 in parts if DIY, $300–600 if professional). Keeps authenticity. Risk: if internal casting is corroded beyond recovery, rebuilding fails.
- Reproduction carburetor — New old-stock reproduction carbs exist for popular classics (Edelbrock, Holley, etc.). $400–800. No surprises, warranty included. Not original, but bolt-on reliability.
- Keep original after repair — Do the basics (clean, replace gaskets, verify float height and needle seat function) and see if it holds. Cheapest and easiest. If it fails again in six months, move to rebuild or reproduction.
I usually recommend trying the cheap path first. If your float bowl just had varnish crud and the gaskets are the problem, a $30 gasket set and four hours of your time solves it. You’ll know in a week whether that was enough. If internal corrosion or needle wear is the culprit, you’ll find out the same way — rough idle returns, flooding starts again — and you’ll know rebuild is mandatory. No money wasted on a solution that won’t hold.
“`


Stay in the loop
Get the latest classic car craze updates delivered to your inbox.