Why Fuel Pumps Stop Priming in Classic Cars
Classic car fuel pump priming has gotten complicated with all the misinformation flying around, honestly. I’ve spent more hours troubleshooting this than I’d care to admit — standing in a driveway with gas-stained hands while my 1967 Chevelle sat refusing to start. The mechanical fuel pump, that simple, ingenious device bolted to your engine block, operates on entirely different principles than modern electric pumps. Understanding that difference? That’s where most diagnostic work actually begins.
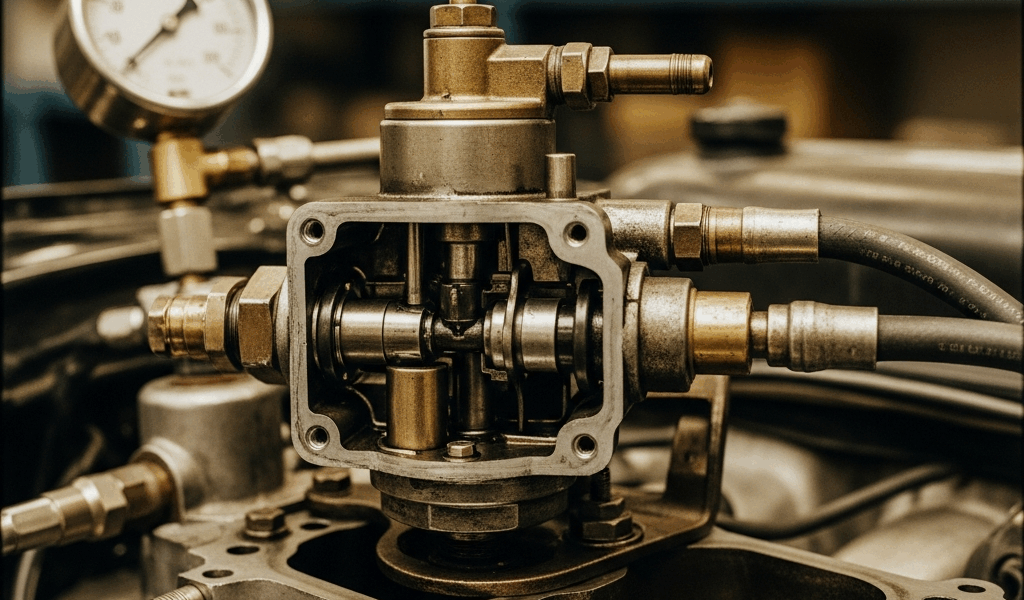
Here’s the mechanical reality. Your classic fuel pump works through engine vibration. A cam lobe on the engine’s camshaft strikes a rocker arm connected to a flexible diaphragm inside the pump housing. This creates a vacuum. That vacuum pulls fuel from the tank through the fuel line. No electricity. No computer adjustment. Just metal, rubber, and physics working together — until they stop.
Gravity-feed systems, common on older vehicles and some British classics, relied on the fuel tank sitting higher than the carburetor. Fuel flowed downward naturally. Mechanical pumps added suction to assist this flow and maintain pressure during acceleration and uphill driving. The distinction matters because a gravity-feed system will occasionally run on gravity alone if the mechanical pump fails completely, whereas a mechanical-pump-dependent system dies immediately.
Age deteriorates everything. The diaphragm — that rubber membrane doing all the work — hardens over decades. Gaskets shrink. Internal check valves lose their sealing ability. I’ve opened pumps from the 1950s where the rubber looked like dried leather. The pump may still tick and move, creating the illusion of function, but it’s not creating adequate vacuum. That’s why a pump that “used to work fine” stops priming after your car sits unused for three winters.
Priming failure differs fundamentally from fuel starvation at speed. Priming means the pump cannot initially draw fuel into the carburetor bowl when you first crank the engine. Fuel starvation happens during driving — the engine starts fine but dies under acceleration or load because the pump cannot maintain pressure. These require different diagnostics. Different fixes entirely. Don’t make my mistake. I’ve replaced perfectly functional pumps based on speed-starvation symptoms that actually traced back to a collapsed fuel line.
How to Test If Your Fuel Pump Is Actually Priming
Start with your ears before you touch anything. Turn the ignition key to the on position — not cranking, just on. Listen at the engine block near the fuel pump. A working mechanical pump produces a distinct ticking or clicking sound as the camshaft lobe cycles. That sound happens roughly 500 to 1,000 times per minute depending on idle speed. Silence means the pump isn’t being driven, which points toward a separated cam follower or broken rocker arm rather than pump failure.
Next, check fuel pressure at the carburetor inlet. You’ll need a fuel pressure gauge — nothing exotic here. A basic 0-15 PSI gauge from any auto parts store costs under $25. Disconnect the fuel line from the carburetor using a line wrench (not pliers — line wrenches protect the fitting). Attach your gauge to the carburetor fuel inlet. Have someone crank the engine while you observe the gauge needle. A mechanical pump should produce 4 to 7 PSI immediately upon cranking. If the needle stays at zero for 10 or more seconds before rising, your pump isn’t priming.
Watch for the pattern. Does pressure spike then drop? That’s a leaking check valve inside the pump or a crack in the fuel line that lets air in. Does pressure climb slowly over 30 seconds? The pump is working but starved for fuel — likely a kinked line or clogged tank screen. Does pressure stay at zero no matter how long you crank? The diaphragm has failed or the pump is completely disconnected from the camshaft.
Listen to the actual engine cranking sound while testing. If the engine cranks normally but won’t catch, fuel delivery is likely your problem. If cranking sounds labored or slow, your battery might be too weak to properly cycle the pump or turn the engine fast enough to generate priming action. That’s a separate issue entirely.
Fuel should reach the carburetor bowl within 15 seconds of continuous cranking. Remove the carburetor air horn (the metal cover on top) carefully — fuel vapors are present. Look into the bowl. Crank the engine and watch for fuel squirting from the fuel inlet fitting. No fuel appearing means the pump hasn’t primed. Fuel appearing but the engine still won’t start suggests a carburetor problem unrelated to pump priming.
Air Locks and Vapor Lock Diagnosis
Air trapped in fuel lines prevents priming more often than actual pump failure. I learned this the hard way after replacing a perfectly good pump because I ignored an air bubble that kept returning after each attempt to prime the engine.
Here’s why air locks happen. When you crack open a fuel line for any reason — replacing a filter, accessing a fitting, or during storage when fuel evaporates — air enters the line. The mechanical pump’s vacuum cannot lift a continuous air column from the tank to the carburetor. The pump cycles futilely against air resistance. Pressure never builds. No fuel arrives.
Vapor lock is the hot-weather variant. Fuel boils inside the fuel line, creating vapor bubbles that interrupt the liquid fuel column. This happens most aggressively in the line segment closest to the engine where heat radiates from the block and manifold. A pump that primes fine in cool morning conditions fails completely by mid-afternoon in summer. The engine starts, runs for 10 to 15 minutes, then dies. Restarting fails until the fuel cools — which might take 30 minutes of waiting.
Air lock symptoms: engine cranks briskly but never catches, fuel pressure gauge shows zero immediately and stays there, no fuel reaches the carburetor bowl despite the pump ticking. Vapor lock symptoms differ — the engine starts and runs initially, fuel pressure rises to normal (5 to 6 PSI), the car drives for several minutes then suddenly dies as if you killed the ignition, and restarting is impossible until cooling time passes.
Test for air locks by loosening the fuel line at the carburetor inlet while someone cranks the engine slowly. Fuel should spray out within 5 to 10 seconds of cranking. No fuel spray means an air lock between tank and carburetor. A weak spray that increases over 30 or more seconds means the pump is fighting air resistance and barely winning.
Vapor lock reveals itself through temperature correlation. If your car always fails to start or dies in afternoon heat but runs fine in morning coolness, suspect vapor lock. The fix requires either insulating the fuel line with foam wrap (costs $12 to $18), rerouting the line away from hot engine surfaces, or installing a small heat shield made from aluminum sheet metal between the fuel line and the exhaust manifold.
Common Fixes That Actually Work
Manual priming requires no tools and costs nothing. This is your first attempt before any other intervention. Locate the fuel pump and locate the small priming lever (a bent piece of metal attached to the pump rocker arm). Many pumps have a small handle you can push down manually. Push this lever down slowly and release, allowing the spring to return it. Repeat this 10 to 15 times. This manually cycles the diaphragm and can draw fuel into the line. Some pumps lack an external lever — in that case, you’ll need to remove the pump and manually cycle the rocker arm by hand while the camshaft lobe isn’t pressing it.
Replacing the fuel line check valve solves many priming failures and costs under $10 in parts. The check valve — a one-way valve that prevents fuel from flowing backward — sits either inside the pump outlet fitting or in a separate housing on the line. When this valve sticks or loses its seal, the pump cannot build pressure. You can test it by removing the fuel line at the carburetor end and blowing gently through the line toward the pump. You should feel resistance and hear a faint click as the valve snaps open. If air flows freely in both directions, the check valve has failed. Replacement takes 20 minutes and zero special tools.
Cleaning fuel tank sediment often fixes fuel starvation issues that mimic priming failure. Drop a fuel tank and slosh a quart of acetone or carburetor cleaner inside, agitating vigorously to dislodge varnish and rust. Drain this completely. The pump inlet screen (a small strainer at the fuel pickup tube inside the tank) frequently clogs with decades of oxidation. Removing and cleaning this screen — or replacing it if damaged — costs $3 to $8 in parts and 30 minutes of work. This is mandatory during any fuel system restoration.
Diaphragm replacement requires pump removal but represents a true permanent fix if the diaphragm has hardened or torn. Bolt removal takes 10 minutes. Disassembly takes another 20. You’ll need a gasket kit (typically $8 to $15) and new diaphragm material (some kits include this). Reassembly requires careful attention to diaphragm orientation and gasket placement. If you’re uncomfortable with small mechanical work, a local machine shop can replace the diaphragm for $40 to $75 in labor, making total cost $55 to $90.
Complete pump replacement comes last. A restored mechanical pump from a specialty supplier costs $65 to $150 depending on application. Used original pumps from online marketplaces run $20 to $50 but carry the risk of the same age-related failures. Consider the cost-to-effort ratio — if manual priming, check valve replacement, and tank cleaning don’t solve your problem, pump replacement is justified.
When to Upgrade vs. Restore Stock
Electric fuel pump conversion exists as the nuclear option. A low-pressure electric pump (3 to 5 PSI output) from a supplier like Holley or Edelbrock costs $80 to $200 installed. These solve every priming and vapor lock issue permanently. The conversion requires removing the mechanical pump, installing an electric pump inside or outside the tank, running new electrical wiring, and adding a relay circuit.
I don’t recommend this for authenticity-focused restorations. Your original mechanical pump, once properly diagnosed and repaired, will outlast any electric replacement. The original pump is part of your car’s engineering signature. It’s what the designers intended. Repair it.
Electric conversion makes sense if you plan to use the car as a daily driver in hot climates, if the original pump is damaged beyond reasonable repair, or if you’ve already attempted multiple fixes without success. For weekend driving, occasional shows, and regional road trips, restoring the original pump invariably proves more rewarding.
Start with diagnosis. Test pressure. Check for air locks. Manual prime the pump. Replace the check valve. Clean the tank. These five steps solve 85 percent of priming problems without any pump removal. Only when these fail should you consider replacement or conversion. Your classic deserves that respect.

Stay in the loop
Get the latest classic car craze updates delivered to your inbox.