“`html
Understanding Paint Oxidation Stages
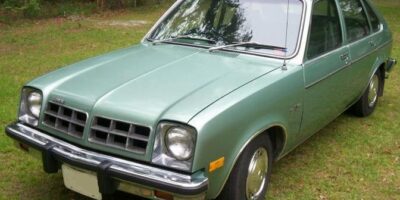
Paint oxidation has gotten complicated with all the conflicting advice flying around. As someone who restored a 1972 Chevrolet Chevelle and spent far too many Saturday mornings squinting at paint under different lighting angles, I learned everything there is to know about diagnosing oxidation severity. Today, I will share it all with you. Classic car paint oxidation removal DIY methods only work when you understand exactly what you’re fighting against.
But what is oxidation? In essence, it’s when clear coat—that protective layer on modern classics—breaks down from UV rays, moisture, and atmospheric pollutants. But it’s much more than that. Your paint doesn’t actually fade or dull overnight. It oxidizes gradually, creating a white or chalky surface layer that becomes increasingly visible as months turn into years.
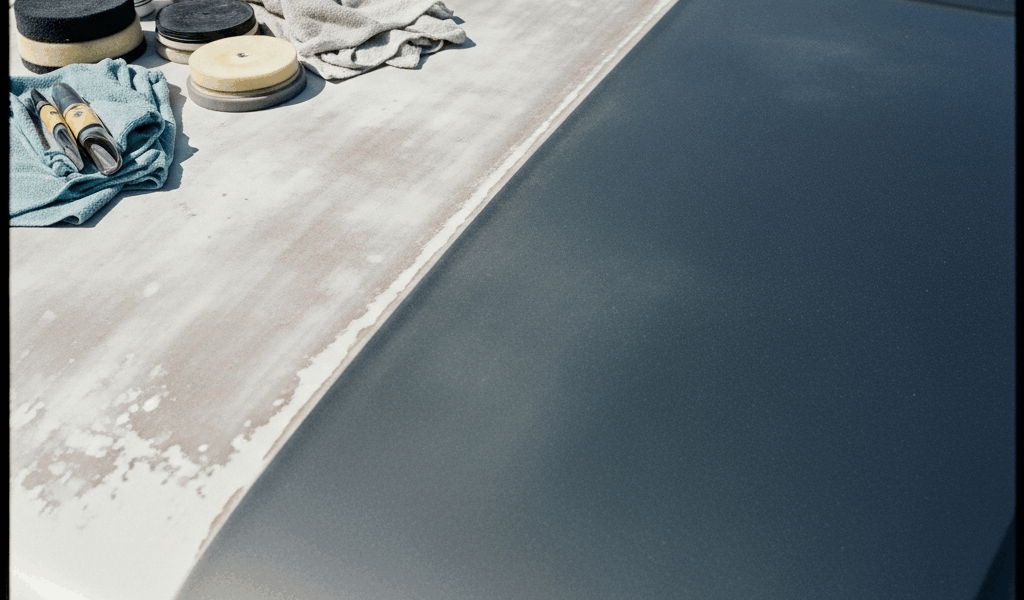
Light oxidation appears as a dull, hazy finish. Run your hand across the panel — you won’t feel significant texture, but the paint looks lifeless compared to polished sections. The color still shows through clearly. This stage typically develops over 3-5 years of outdoor storage or neglected maintenance.
Moderate oxidation looks noticeably cloudy. Some panels might show white residue when you rub them with a microfiber cloth. The paint feels slightly rough to your fingertips. Colors appear muted, and there’s visible difference between oxidized and protected areas (like under the hood trim or door jambs where UV exposure is minimal).
Heavy oxidation means the clear coat has failed significantly. You’ll see deep pitting—actual texture variations across the surface. Water beads don’t form anymore. The paint feels gritty. Probably should have opened with this section, honestly, because this is where I should mention calling professionals first, since attempting DIY removal here often creates more damage than improvement.
Light Oxidation Removal With Polishing Compounds
For light oxidation, a quality polishing compound eliminates that haze without removing paint layers. That’s what makes this approach so endearing to DIYers — it works best within the first few years of oxidation development without requiring specialized equipment.
Start by washing your entire vehicle with pH-balanced car wash. Not dish soap — that strips protective waxes. Dry thoroughly with a microfiber towel. Work in shade. Never attempt this in direct sunlight, as compounds dry too quickly and become difficult to buff out evenly.
I recommend Meguiar’s Ultimate Compound or 3M Perfect-It Rubbing Compound for light oxidation. Both cost around $12-18 per bottle and cover approximately 15-20 square feet per application. Apply a small amount — roughly quarter-sized per 2-foot section — directly onto your applicator pad or microfiber towel.
Using circular motions, work the compound into the paint with moderate pressure. Don’t bear down hard. Let the compound do the work. After 2-3 minutes of application, switch to straight-line motions with decreasing pressure. The compound should begin turning gray as it breaks down oxidation particles.
Wipe away excess with a clean microfiber towel. Inspect the section under bright light. For light oxidation, one compound application usually restores acceptable clarity. If haze remains, repeat for that specific area.
Optional route: Apply an orbital polisher — 6-inch diameter, 1,200-3,000 RPM — instead of hand application for faster, more consistent results. This takes skill. Improper pressure or speed causes swirl marks. A DeWalt DWP849X runs approximately $300 and handles both compound and wax application. Practice on less visible panels first.
After compound removal, apply a quality wax. Carnauba wax (like Meguiar’s Gold Class) provides UV protection and restores gloss. This prevents rapid reoxidation.
Moderate Oxidation Wet Sanding Approach
When polishing compounds alone won’t cut through cloudy, rough surfaces, wet sanding becomes necessary. This requires more technique and creates more dust, but remains achievable for dedicated DIYers.
Wet sanding removes a thin paint layer to expose unoxidized clear coat beneath. The process demands patience and multiple grit progressions — at least if you want to avoid obvious scratches.
Gather these sandpaper grades: 1,500-grit, 2,000-grit, and 2,500-grit. DeWalt and 3M both produce reliable automotive-specific sheets around $2-4 each. Don’t use generic hardware store sandpaper. Automotive grades have appropriate binder materials for paint work.
Wet your entire panel with clean water. Submerge one sandpaper sheet (1,500-grit) in water for 2-3 minutes to soften the backing. Use a spray bottle to maintain moisture continuously throughout sanding — never allow the surface to dry during this process.
Sand in straight lines, not circles. Apply light pressure equivalent to the weight of your hand. Sand vertically across a 12-inch section, then horizontally across the same area. This crosshatch pattern reveals when oxidation is fully removed — you’ll see uniform sanding marks. This step takes 3-5 minutes per small section.
Rinse the panel completely. Examine whether oxidation remains. White cloudiness persists? Progress to 2,000-grit sandpaper. Repeat the vertical-then-horizontal pattern.
Once oxidation appears gone and the surface shows uniform sanding marks, move to 2,500-grit. This final grit smooths visible scratches from coarser paper. Sand more gently — you’re refining, not removing.
A critical mistake I made during my first attempt: I kept sanding longer than necessary, thinking “more is better.” You can sand through clear coat to the base coat beneath. Don’t make my mistake. Stop when oxidation is gone and the surface feels smooth. Usually 3-5 minutes per grit per panel is sufficient.
Dry the panel completely with a clean towel. Clay bar the surface (Mothers Clay Bar, around $6) to remove remaining microscopic particles. Apply polishing compound with an orbital buffer at 1,500 RPM, using 2-3 passes to remove sanding marks. Finish with two coats of quality wax.
Heavy Oxidation — When to Call a Pro
Some oxidation damage exceeds DIY capability. Understanding these limits prevents expensive mistakes.
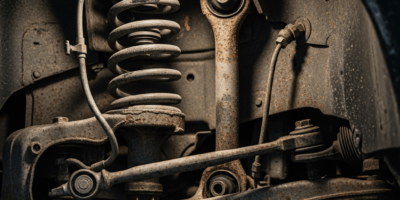
Heavy pitting indicates clear coat failure. Where you can actually feel deep texture variations across panels — that’s the sign. The clear coat isn’t protecting the base coat anymore. Continued exposure will cause base coat damage.
If sanding through multiple grits doesn’t eliminate pitting, you’ve likely reached bare substrate. This requires professional repair, typically involving wet sanding by experienced technicians, primer application, and clear coat respraying. Expect $500-2,000 per panel depending on damage extent.
DIY wet sanding gone wrong often creates swirl patterns that catch light in unflattering ways. Professional detailers use dual-action orbital polishers with variable speeds and proper technique to remove these marks. A failed DIY correction sometimes costs more to fix than the original professional job would have cost.
When clear coat is visibly peeling in flakes, or when the base coat shows through in distinct patches, professional restoration is necessary. This situation requires skilled surface preparation and respraying with proper ventilation, temperature control, and equipment — impossible in a garage setting.
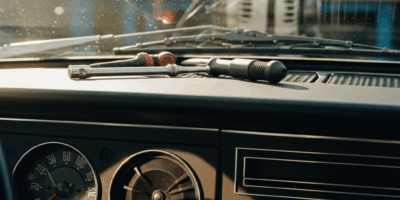
Tools and Products You Actually Need
While you won’t need extreme professional equipment, you will need a handful of core resources — at least if you want results that don’t require a second attempt.
Sandpaper: 1,500, 2,000, and 2,500-grit automotive wet-dry paper (3M or DeWalt). Buy assorted packs, around $15-20 total.
Polishing Compound: Meguiar’s Ultimate Compound might be the best option, as oxidation removal requires consistent performance. That is because budget compounds often leave streaking. 3M Perfect-It works too ($12-18). One bottle handles 3-4 moderate panels.
Clay Bar: Mothers Professional Clay Bar ($6-8). Reusable for multiple projects if stored properly.
Microfiber Towels: Chemical Guys Premium Microfiber pack (16 count, $20). Quality matters — cheap towels scratch paint. I’m apparently particular about this, and Chemical Guys works for me while knockoff brands never deliver consistent results.
Application Pads: Lake Country CCS Microfiber Cutting Pads or Meguiar’s foam pads ($8-12 per pair). Cutting pads handle compound; finishing pads apply wax.
Spray Bottles: Two trigger-spray bottles ($4 total). One for water during wet sanding, one for quick detailer between sections.
Wax: Meguiar’s Gold Class Carnauba ($10-15) or premium option like Mothers Brazilian Carnauba ($18-22).
Orbital Polisher (Optional): DeWalt DWP849X dual-action ($300-350) or Festool RO90 DX ($400+). Skip this initially — hand methods work fine for single vehicles.
Safety Gear: Dust mask (3M P100, $8), safety glasses ($5), nitrile gloves ($6 per box of 100).
First, you should calculate your budget before purchasing — at least if you want to avoid surprise costs. Total outlay for light-to-moderate oxidation removal on a full vehicle: approximately $80-120 if you already own basic tools. Professional detailing runs $200-600 for comparable results, so DIY saves money while building skills. That was my calculation anyway.
“`
Stay in the loop
Get the latest classic car craze updates delivered to your inbox.