Why Your Classic Car Alternator Stops Charging
I’ve spent the better part of fifteen years troubleshooting electrical gremlins in older vehicles, and classic car charging system failures hit different than modern car problems. Your 1968 Mustang or 1975 Triumph doesn’t have computer modules and self-diagnostic systems. When something breaks, it actually stays broken — no warning light, no dashboard alert.
Worn brushes inside the alternator are the most common culprit I see. These carbon strips wear down over thousands of charging cycles, eventually losing contact with the spinning rotor. Mechanical voltage regulators — those separate boxes bolted to your chassis or engine bay — fail constantly. They corrode from moisture, contacts get pitted, and suddenly your alternator charges at 16.5 volts one minute and drops to 11 volts the next. Battery terminals oxidize into white or blue-green crusty formations that look harmless but create invisible resistance killing charging efficiency. A corroded connection might look fine to your eye but measure 0.5 ohms of resistance when a proper connection should be nearly zero.
The real difference? Older charging systems run hotter and less regulated than modern ones. That’s not a bug. That’s the design.
The Battery Test First Step You Must Do
Before you blame the alternator, you need baseline numbers. Grabbed my Fluke 115 multimeter last month when a friend’s 1972 Chevelle wouldn’t start, and this sequence saved him $180 in unnecessary parts.
Step 1: Resting Voltage
Engine completely off. Key out. Let the car sit for five minutes if you’ve been driving it. Set your multimeter to DC voltage. Touch the red probe to the positive battery terminal — that’s the one with the + symbol or red cover. Black probe goes to negative. You should see between 12.4 and 12.8 volts on a healthy battery. If you’re reading 11.8 volts or lower, your battery is discharged or dead. That’s your problem right there. Probably should have opened with this section, honestly, because ninety percent of people skip this step and go straight to blaming alternator failure.
Anything below 12 volts means your battery cannot hold a charge. Could be the battery itself. Could be the alternator isn’t charging. Could be a parasitic draw draining power overnight. You need this baseline first though.
Step 2: Cranking Voltage
Keep the multimeter connected across the battery terminals. Have someone turn the ignition key to crank the engine (don’t start it — just crank). Watch the voltage drop while cranking happens. You’ll see it dip to 9.5-11 volts during the crank. Normal behavior. The starter motor pulls massive current and voltage sags temporarily. When the person releases the key and stops cranking, the voltage should bounce back to 12.4 volts within a second or two.
If it stays low — like 10.5 volts — or climbs very slowly, your battery is weak or your cables have serious resistance. Bad cables are sneaky. A corroded cable connection feels solid but electrically acts like pushing current through a garden hose filled with sand.
Step 3: Visual Inspection
Look at the battery terminals themselves. On my 1968 Plymouth, the positive terminal had what I can only describe as white fuzzy growth covering the connection. That white or blue-green crust is oxidation and it doesn’t conduct electricity well. Scrape it off with a wire brush. Use a wrench to loosen each terminal clamp, pull it off, and inspect the metal underneath. If the clamp or post is heavily corroded, that connection is your bottleneck. Clean both the post and the inside of the clamp with the wire brush. Some people use sandpaper or a battery terminal cleaning tool ($4-8 at any auto parts store). Reconnect finger-tight, then add a quarter-turn with your wrench.
While you’re under the hood, trace your battery cables all the way to the engine block. Make sure the negative cable actually connects to the engine, not just the battery. Bad grounds cause half of all electrical mysteries in classic cars.
Testing Your Alternator Output With a Multimeter
Now the engine runs. This is where you find out if the alternator is actually charging.
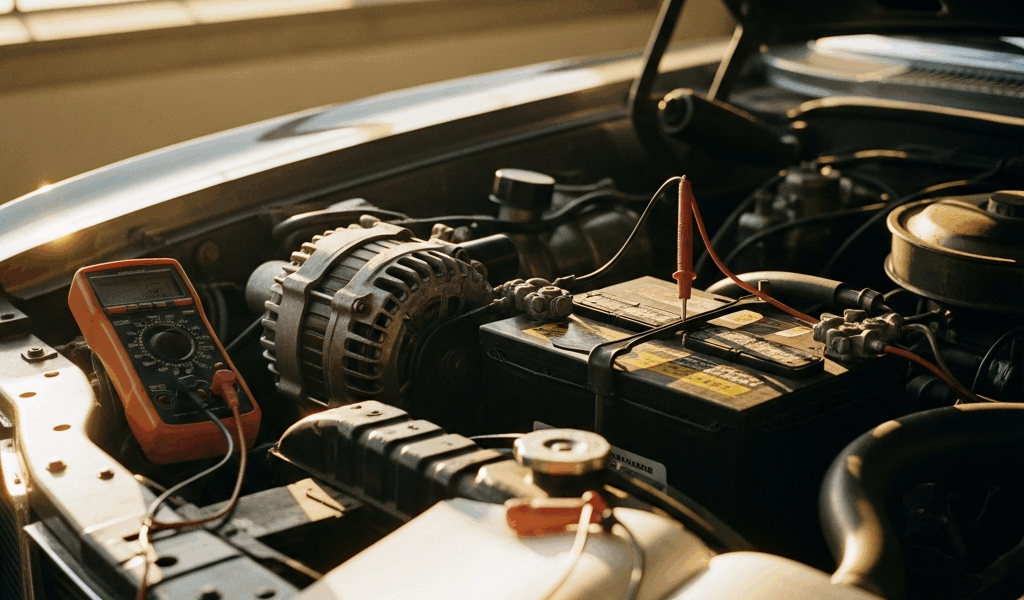
Keep your multimeter in DC voltage mode. Leave it connected across the battery terminals. Start the engine and let it idle. In thirty seconds, you should see voltage climb to 13.5 to 14.5 volts. That’s the alternator doing its job — pushing current back into the battery.
Rev the engine to around 2000 RPM. The voltage may bump up slightly to 14.2 or 14.5 volts. Hold it there for ten seconds. Write down what you see.
Here’s the classic car quirk: mechanical voltage regulators often run hotter than modern electronic ones. You might see 14.8 or even 15 volts on a properly functioning 1970s charging system. That’s not an overage — it’s normal. Anything consistently above 15.5 volts means your regulator is pushing too hard, and that will cook your battery. Anything below 13.2 volts means the alternator isn’t charging.
Critical warning: Make absolutely sure you have polarity correct. Positive (red probe) to positive. Negative (black probe) to negative. Reversing polarity won’t damage your multimeter, but it will give you a negative voltage reading that looks wrong and feels like you’ve broken something. You haven’t. Flip the probes and you’ll see positive numbers again.
Voltage Regulator Failures in Older Vehicles
If your resting voltage is good, your cranking voltage is good, and your battery terminals are clean — but the alternator isn’t pushing 13.5 volts when running — the voltage regulator is your suspect.
Most classic cars have mechanical regulators mounted externally. You’ll find it bolted to the fender, engine block, or inner fender panel. Two to four wires plug into it. Mine was hidden behind the shock tower on my Dodge, corroded and barely hanging on by one bolt.
Here’s the definitive test: disconnect the voltage regulator connector. With the engine running, measure the voltage directly at the alternator’s main output wire — the one that goes back to the battery. You’re looking for what the alternator produces before the regulator controls it.
You’ll probably see 15 to 16 volts, sometimes higher. The regulator’s job is to dial that back to 13.5-14.5 volts. If disconnecting the regulator makes voltage jump from 13V to 16V or higher, your regulator is failing. It’s not doing its controlling job anymore.
What I found on a 1975 Triumph: the regulator showed 13.5V output with the regulator connected, but 16.8V at the alternator with the regulator disconnected. The regulator was stuck and unable to control the charge rate. A new mechanical regulator ($85-140) fixed it completely.
Some people opt for electronic regulator kits that bolt into the old regulator housing. They’re cheaper ($40-70) and more reliable than the original mechanical units. That said, don’t skip this diagnostic step. Replacing the regulator when the alternator itself is failing is wasted money.
When to Replace vs When to Repair
You’ve got numbers. Now comes the financial decision.
Brush replacement kits cost $20-40. They include replacement carbon brushes and sometimes a complete brush assembly. You unbolt the alternator, remove the rear cover, slip out the old brushes, and install new ones. This takes maybe ninety minutes if you’re careful. Rebuild kits for Delco, Lucas, or Motorola alternators are readily available online. This is the budget-conscious move, and it works if the brushes are truly worn and everything else inside looks clean.
Drawback: if the windings are burned, the commutator is pitted, or internal corrosion is heavy, a brush replacement won’t save a bad alternator. You’ll do the work, reinstall it, and discover the same problem three months later.
Rebuilt alternators run $150-300 depending on the year and model. Your local alternator shop can rebuild yours for $120-200 if you want original-style output. You leave your alternator and get back a core-swapped replacement. Pros: guaranteed to work, shop warranty usually included, you don’t spend a weekend doing mechanical work. Cons: higher upfront cost and you’re without your vehicle for a few days.
Visible damage that means repair won’t hold: if you see arcing marks on the commutator (burnt copper stripes), burned coil windings (blackened copper wire), or heavy corrosion inside the alternator housing, replacement is smarter than repair. A $40 brush kit won’t fix burned windings.
Last summer, pulled the alternator off my buddy’s 1969 Chevrolet. The brushes were worn down to half their original size — textbook failure. Everything else inside looked pristine. He bought a $28 brush kit, spent an hour and a half rebuilding it, and that alternator has charged properly for eighteen months since. That’s the win.
Compare your time investment against the part cost and risk. If you value your weekend and can afford a rebuilt alternator, go that route. If you’ve got the mechanical confidence and want to save money, a brush replacement is legitimate. Either way, you now have a diagnosis instead of guessing.




Stay in the loop
Get the latest classic car craze updates delivered to your inbox.