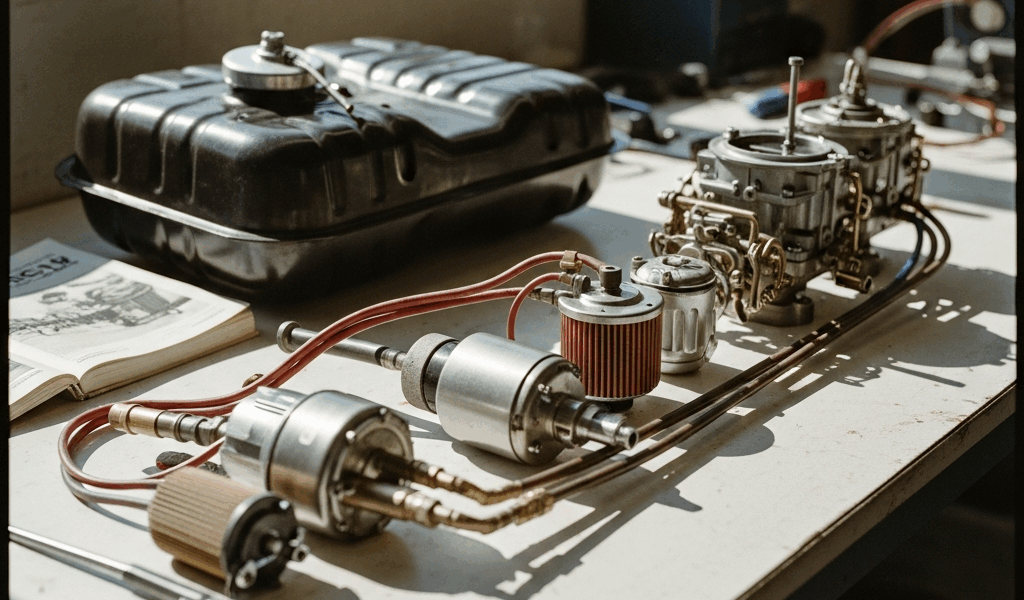
How Classic Car Fuel Systems Differ from Modern Ones
Classic car fuel systems have gotten complicated — at least in terms of the misinformation flying around about how to fix them. Your 1972 Chevelle or 1965 Mustang runs on gravity feed or a simple mechanical pump pushing fuel through rubber lines into a carburetor. No computer. No fuel injector diagnostics. No pressure regulator talking back to an engine control module.
Modern cars run electronic fuel injection at 40+ PSI. Multiple sensors feed real-time data to a computer that adjusts fuel flow constantly. Something fails, and the check engine light points you straight at it. A classic car? It just quits. Or sputters. Then you’re standing in the driveway guessing between the tank, the pump, the lines, and the carburetor.
But what is a classic fuel system, really? In essence, it’s a gravity-fed or low-pressure mechanical chain moving fuel from tank to carb with zero electronic input. But it’s much more than that — it’s a system that punishes guesswork and rewards anyone who actually traces the problem from source to symptom. I spent six months chasing my 1970 Dodge Charger’s fuel issue thinking the pump was toast. The problem was in the tank the entire time. Don’t make my mistake. Learning to walk the full delivery chain saved me several hundred dollars and a lot of frustration.
The Most Common Classic Car Fuel System Symptoms
Before you touch a wrench, figure out what the car is actually doing. Symptoms are the map. Skip reading the map and you’ll end up somewhere you didn’t intend.
Hard Starting When the Engine Is Warm
Cold start is fine. Shut it off for five minutes, try again — cranks and cranks before it catches. That’s almost always fuel evaporating out of the carburetor bowl, or a weak pump that can’t re-pressurize fast enough after a heat soak. Varnish buildup inside the carb passages makes it worse. Heat hits, fuel stops flowing, and the engine just sits there cranking.
Sputtering Under Load or Acceleration
Idles smooth, then stumbles the second you press the pedal hard. You’re asking the fuel system to deliver volume — and something in the chain can’t keep up. Usually the pump. Sometimes a clogged line. Occasionally a carb needle valve that’s gotten sticky and won’t fully open.
Dying at Idle or Stalling at Stops
Rough idle, then it quits at the red light. That points to inadequate fuel pressure or sediment sitting in the carb jets. The engine needs just barely enough fuel at idle to stay alive. Delivery falters even slightly, it dies. That’s what makes this symptom so frustrating — it happens with no warning.
Fuel Smell in the Cabin
Raw gasoline smell inside the car. A cracked or separated fuel line is leaking somewhere along the frame. Could also be a carburetor overflow tube dripping into the engine bay. Safety issue first, diagnosis second — every time.
Loss of Power at Highway Speed
Cruising steady, then the engine feels like it dropped a cylinder. Power falls off. Maybe a light shake in the car. At highway RPM the pump or filter can’t supply enough flow to keep up. Gravity-feed cars sometimes do this on long uphill stretches too.
How to Diagnose a Classic Car Fuel Delivery Problem
Probably should have opened with this section, honestly. Most people grab a wrench and start pulling things apart without a plan. Here’s the correct sequence — the same one mechanics have used for fifty years.
- Check fuel at the carburetor inlet. Turn the ignition on without starting the engine. Disconnect the fuel line at the carb and catch any fuel in a container. You want a solid stream. A dribble — or nothing — means there’s a delivery problem upstream. If fuel pours out strong, the issue is probably the carb itself, not the fuel system behind it.
- Test fuel pump pressure. A mechanical fuel pressure gauge runs about $25 at any auto parts store. Install it on the fuel line between the pump and carb. Most mechanical pumps should show 4–6 PSI. Gravity feed systems run lower — around 0.5–2 PSI. Below spec means the pump is weak or failing.
- Inspect the fuel lines. Get under the car and look. Rubber fuel lines from the 1960s and 1970s crack and collapse internally, restricting flow without showing any damage on the outside. Squeeze them. They should have a little give — not feel like rigid plastic pipe. A hardened line is either clogged or internally collapsed. Modern E10 gasoline accelerates this decay faster than most people realize.
- Check the fuel filter. Most classics have a small inline canister filter between the pump and carb. Unscrew it. White or light yellow element means it’s still serviceable. Dark brown or black means it’s clogged and killing your flow. Replace it. This is the cheapest diagnostic move available — and it fixes roughly 20% of fuel system complaints before anything else needs to happen.
- Look inside the tank. Weak fuel stream everywhere in the system usually means the problem starts at the tank. Rust, sediment, a collapsed pickup tube. Drain the tank carefully, pull it, and look inside. Reddish-brown flakes mean rust. Hard amber coating on the walls is varnish — common in cars that sat for years without being run.
- Examine the carburetor. Pull the bowl off the bottom of the carb. Fuel inside should be clear and smell like fresh gasoline — not stale, not brown. Discolored fuel means you need to drain it and run clean gas through. Check the needle valve seat for any debris. One fleck of varnish can prevent the valve from sealing, causing the engine to either overflow or starve.
This sequence works because it follows the actual path fuel travels. Start where the symptom shows up — the carb — then work backward toward the source. Good pressure at the carb means the carb needs cleaning. Pressure dies before the carb, focus between the pump and carb. Pump shows weak numbers, trace back to the tank. Simple chain. Walk it once and you’ll never guess blindly again.
Fuel Tank, Lines, and Filter Issues That Get Overlooked
These three components cause more grief than anything else on a classic fuel system — partly because owners go years without touching them. That’s what makes these problems so endearing to those of us who work on old iron. They’re completely preventable, and yet.
Rust and Sediment in Steel Tanks
Original steel tanks in 1960s cars rust from the inside out. Water seeps in through the vent or filler neck. Condensation builds up when the car sits in a garage through winter. Over time you get a layer of sediment — rust flakes and varnish — floating in the fuel, clogging filters, and eventually plugging carb passages.
You’ll know it when you drain the tank. Fuel runs out brown or cloudy. The tank interior looks rough and mottled. Light surface rust can be addressed with an epoxy coating kit — around $100–$200, available from most restoration suppliers. Heavy corrosion means replacement is actually cheaper and cleaner than trying to save the original.
Collapsed or Hardened Rubber Lines
Fuel lines from the 1960s and 1970s were rubber compounds never designed to survive fifty years. Modern E10 gasoline — standard at virtually every pump in the country now — attacks that old rubber aggressively. The line hardens, cracks internally, or collapses like a pinched straw. Flow drops to a trickle and you blame the pump.
I’m apparently sensitive to this particular failure mode and Spectre barrier hose works for me while the original rubber lines never lasted more than a season. Replaced my Charger’s lines — Year One brand, about $40 total for materials — and fuel delivery became rock solid. Install time was maybe an hour, not rushing.
Clogged Inline Filters
That small canister between the pump and carb is your first line of defense against tank sediment. Over a year or two it loads up and flow drops. A clogged filter gets blamed on the pump constantly. It’s the pump. It’s never the pump. Check the filter first.
OEM Fram or AC Delco inline filters run $8–$15. Replace it as your first move before suspecting anything else. If pressure is still weak after a fresh filter, then dig into the pump or tank.
Ethanol deserves a separate mention here. E10 eats through old rubber and dislodges varnish layers, pushing debris into the fuel stream. Running a classic on modern pump gas means planning on flushing the tank every few years and replacing rubber components more frequently than you’d expect. Ethanol-free fuel — available at select specialty stations — extends rubber life noticeably. Worth the extra cost if you drive the car regularly.
When to Rebuild vs Replace Fuel System Components
So, without further ado, let’s dive into the part where money enters the conversation. Once you’ve found the problem, you need to decide: repair it or replace it?
Mechanical Fuel Pumps
A weak original pump can sometimes be rebuilt. Rebuild kits run $30–$50 and include new gaskets, seals, and a diaphragm. An afternoon of careful work and you’re done. Honestly though, a new or remanufactured pump costs $60–$120 and comes with a warranty. For a car you actually drive — not just show — a new pump might be the best option, as a rebuilt original requires the same labor all over again if the new diaphragm fails in year two. That is because quality control on rebuild kits varies widely depending on the brand.
Fuel Tanks
Light surface rust: epoxy seal kit, $100–$200, DIY or shop. Heavy rust: replace. Used tanks from donor cars run $50–$150. New reproduction tanks for popular models like Chevelles and Mustangs run $200–$400. Add 2–3 hours of shop labor and you’re looking at $400–$700 installed, roughly. First, you should get a quote from at least two shops before committing — at least if you’re not pulling the tank yourself.
Fuel Lines
Always replace with modern barrier hose. Rubber from 1975 is not worth preserving — not on a car you intend to drive. Budget $30–$50 in materials for a complete fuel line replacement. An hour or two of labor if you’re not in a hurry. While you won’t need a full shop setup for this job, you will need a handful of proper hose clamps, correct diameter barrier hose, and about thirty minutes of patience getting the routing right under the car.
The Big Picture
Frustrated by a sputtering engine and a growing parts bill, most classic car owners throw money at the carburetor when the real answer is sitting somewhere in a hardened fuel line or a rusted tank. This new approach — walking the diagnostic chain methodically — took hold among serious hobbyists several years ago and eventually evolved into the standard troubleshooting method enthusiasts know and trust today. Most classic fuel problems are solvable for well under $200. A $50 filter swap or $80 in new hose brings more cars back to life than any carburetor rebuild ever did. Walk the chain — tank to pump to lines to filter to carb — and the actual problem becomes obvious every time.


Stay in the loop
Get the latest classic car craze updates delivered to your inbox.